RACHEL 5 Devices shipped between September 2024 and January 2025 have a few bugs that need to be fixed. THIS FIX ONLY WORKS ON CMAL150 DEVICES (RACHEL 5) AND WILL BREAK OLDER RACHEL DEVICES. Those known bugs include:
- teacher portal upload fails
- Webmail accounts (user1, user2…user20) do not function
To fix those bugs and potentially recover any RACHEL 5 with issues, you must download a large file, “burn” that file to a USB stick, plug the USB into RACHEL (while RACHEL is turned off), turn on RACHEL, wait 15 minutes.
Required
- A USB stick at least 4GB in size
- Win32 Disk Imager Software: Download Win32 Disk Imager
- Downloaded recovery file: RACHEL_516R.img - Google Drive
Prepare the USB Stick
- Extract the recovery zip file to your PC
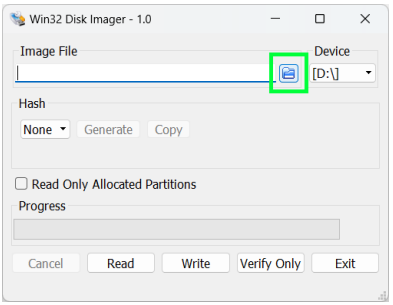
- Place the USB stick in your PC and open the Win32 Disk Imager software
- Click the blue folder icon to select a recovery image
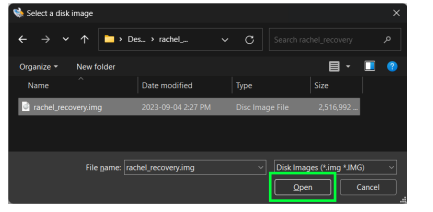
- Browse to your extracted zip le, select the rachel_recovery.img le, then click
‘Open’
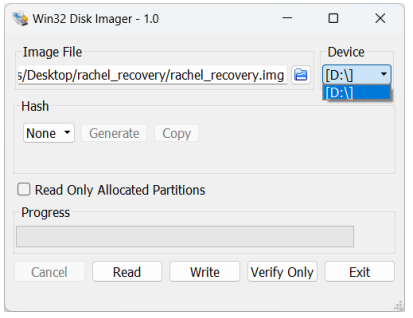
- From the drop down menu select your USB stick (IMPORTANT: Before you continue make sure this is the correct USB drive letter. All content on the USB stick will be deleted. You can check for the correct drive letter in “This PC” or “My Computer” in Windows)
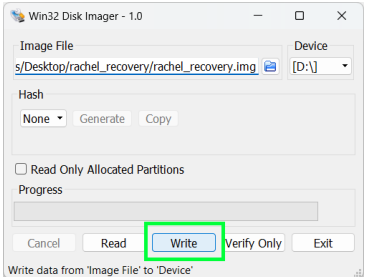
- Click the write button
- Click “continue” when you see a warning message
- Wait for the green progress bar to complete
- Click “OK” when you see the “Write Successful” message
- Safely eject the USB drive from your PC
Recovering Your RACHEL-Plus Device
- Turn off your RACHEL-Plus
- Disconnect all network cables and USB sticks from the RACHEL-Plus
- Make sure your RACHEL-Plus is connected to a power outlet
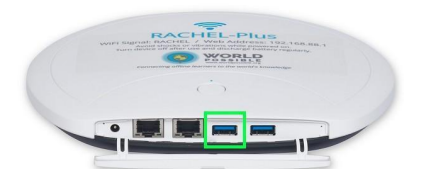
- Plug the recovery USB stick into the far left USB port on the back of the device
- Press the power button until the blue power light turns on then release
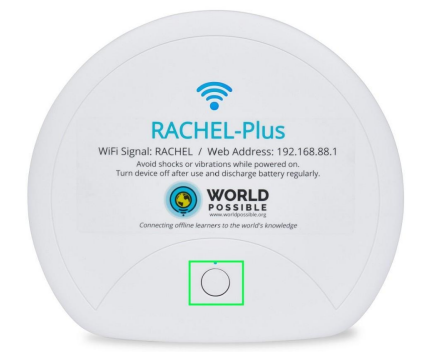
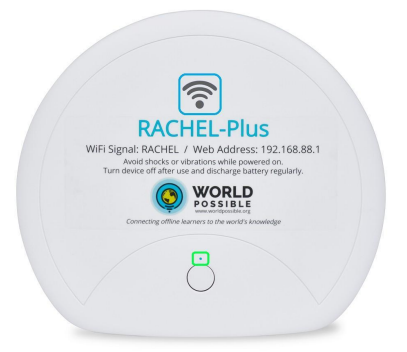
- The recovery process should now be running. The blue power LED will be on as
shown in the green square. The WIFI LED will be off as shown in the blue square
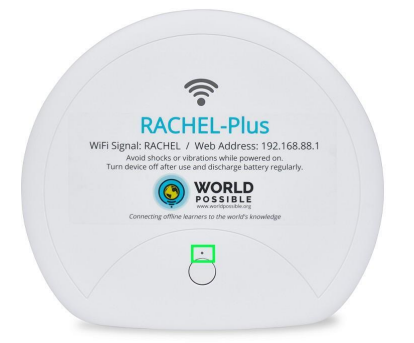
7.When the blue power light turns off the recovery is complete. You can now
unplug the recovery USB stick from the back of the device
- Remove the recovery USB stick from the back of your device
It is important to remove the USB stick or the recovery process will be repeated - Turn on your RACHEL device by pressing the power button until the blue power
light turns on
10.Wait 5 minutes before using your device