Hello,
Here is a quick tutorial for “deconstructing” your RACHEL unit. This should only be used if you know what you are doing and unless otherwise specified directly by us, following this procedure and opening your unit would void any warranty service we offer.
-
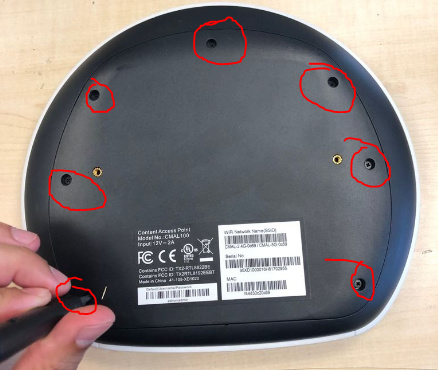
Remove all seven screws from the back of your device:
-
Using a flathead screwdriver, pry the back of the device off. This takes a little pressure to push the flathead screwdriver down far enough.


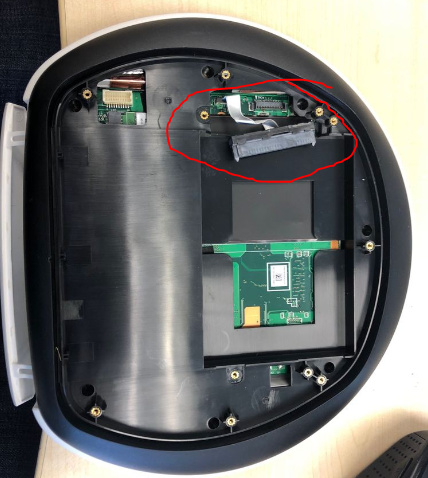
- Disconnect the battery from the motherboard (if you have a battery). This disconnection may happen automatically when you are doing step 2 above.

-
Remove the hard drive cover (8 screws) and disconnect the hard drive cable and remove the hard drive.
-
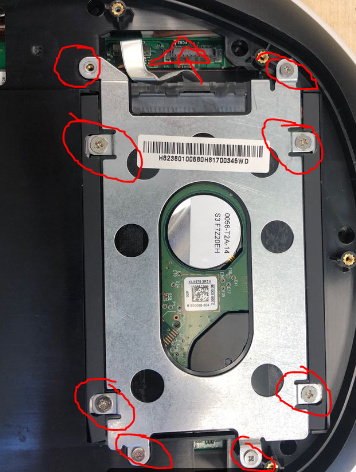
Unscrew 7 additional screws holding the back panel in place:


- As gently as possible, separate the back panel from the white front panel. I did this at the back of the device. Important note: I removed the port cover in the process and was unable to reattach the port cover. This is an optional part so I was OK losing the port cover in the process.

- Remove BOTH WiFi cards from the device.

- Reassemble, being careful to rethread the hard drive cable back through the back panel.